Before you begin: Update Windows, remove incompatible Office installations, use a stable connection, and have your valid 25-character LTSC key ready. If this computer has old Office, Visio, or Project entries from cracks, expired licenses, or a trial, Open the old-license removal guide ↗.
1. Download and start the pre-configured LTSC installer
Recommended for most users: This pre-configured installer is provided as a courtesy. You can download and configure your own LTSC installer from config.office.com, but we cannot provide support for custom configurations. If you do not have technical experience, use the pre-configured installer below.

2. Extract the files and run the installer
Extract all files from the downloaded package. Once everything is extracted, double-click RUN_Install-LTSC to start the installer. If Windows blocks it, right-click the file and choose Run as administrator.

Accept the prompts and choose Yes whenever Windows asks for confirmation.
3. Select the product
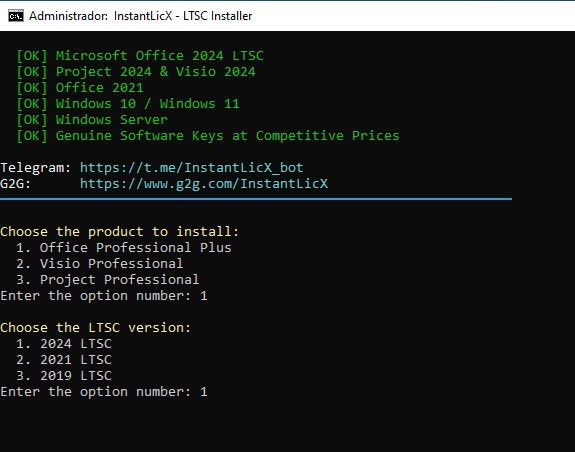
When the installer opens, choose the product you want to install: Office, Visio, or Project. Enter the number shown for your choice, such as 1, and press Enter.

4. Select the version
Choose the LTSC version you want to install: 2019, 2021, or 2024. Enter the number for your selection, such as 1, and press Enter.
5. Select the installation language
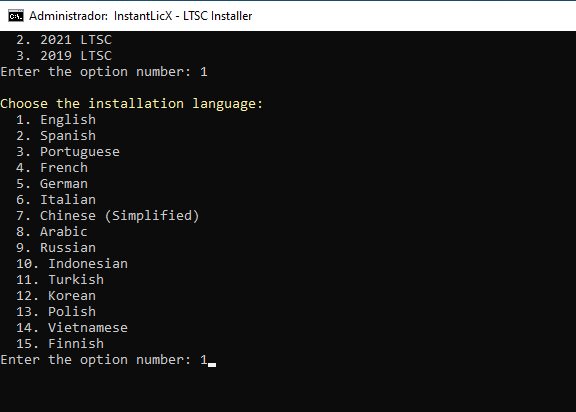
The installer offers 15 languages. Choose the language for your installation by entering its number. For English, enter 1 and press Enter.
6. Confirm the installation
Review the summary of the product, version, and language that will be installed. Type an uppercase Y to confirm and start the installation. Any other value cancels the installation.

7. Wait for the installation to finish
Wait while the installer starts and runs. Keep the computer connected to the internet and do not close the installer until the process finishes.


8. Open the application and enter your product key
Open Word for Office, Project for Project LTSC, or Visio for Visio LTSC. When the activation screen appears, choose I have a product key.

If the activation screen does not appear, go to File > Account, then choose Activate Product or Switch License.

Enter the 25-character key exactly as supplied and select Activate Office. Close every Office application completely, then reopen the product.

9. Choose telephone activation and copy the Installation ID
In the activation wizard, select I want to activate the software by telephone and continue.

The wizard displays an Installation ID (IID) split into groups. Copy every group in order; the complete IID is required to obtain a Confirmation ID.

10. Obtain your Confirmation ID
Choose one of these three methods to exchange the Installation ID for a Confirmation ID (CID):
- Microsoft Product Activation Portal: the official, free option. It is a manual process: sign in, choose product activation, and enter the IID groups.
- InstantLicX Telegram bot: a faster paid option. Send the IID to the Telegram bot as text or as an image; you do not need to enter each group manually.
- GetCID.xyz: a paid web experience that accepts the IID as text or image. It also offers an API, a WordPress plugin for store integrations, and WhatsApp and Telegram bots.
Using the free Microsoft portal
Open the Microsoft Product Activation Portal, sign in with your Microsoft account, choose the option to activate a Microsoft product, and select the version that matches your Office, Project, or Visio LTSC installation.

Select Office. Even when activating Project or Visio, choose the Office year/version that matches the installed LTSC package, such as Office 2021 or Office 2024, and proceed to the Installation ID form.


Paste the complete Installation ID, verify the groups, and submit it.

If the portal asks how many computers have been installed with this copy and this is a new activation, enter 0.

11. Enter the Confirmation ID and finish activation
After the IID is accepted, the selected method returns a Confirmation ID divided into groups.

Return to the activation wizard and enter each CID group into its corresponding box from A through H. Select Next or Finish.

Open File > Account once more. Product Information should now confirm that Office, Project, or Visio is activated.

Troubleshooting
- Make sure the installed LTSC product, edition, and year match the product key.
- Check that the complete product folder is directly in the root of C: or D:.
- Remove incompatible Office editions before reinstalling LTSC.
- Verify that IID and CID groups were copied in the correct order.
- If setup still fails after Windows is fully updated, test on a clean Windows installation.
Need a license?
Buy affordable software licenses
Get Office, Windows, antivirus licenses, and activation help through our official stores.


Are you a reseller?
Build your own license business
Sell digital products through your own Telegram license business or connect HydraCID X to your store by API.